Community content
DRIVER Syndicate is a modding friendly game meaning it welcomes new content from the community with open arms.
To meet this wish, you can Download the level editor to make new maps yourself!
You can also download and enjoy the work of other community members on this page with tutorials on how to install them.
Here is a list of mods already available.
Enabling the Addons
All the mods are called Addons. All you need to do is download the files and put them in the “Addons” folder of your The Driver Syndicate directory. Then, go to the “Addons” sub-menu in the game and enable them (On/Off).
Be aware that some Addons may have conflicts with others. To avoid it, you can still install all of them but do not enable them at the same time in the game menu!
How to install Addons & Mods
After downloading the ZIP/RAR archive of the addons/mods, extract it to *YourTheDriverSyndicateInstallDirectory\Addons* folder.
You will also need to enable it in the main menu of the game. Go to Settings then Addons and use the on/off parameter to enable it.
How to use the console
To use the console, open it with the key above the TAB key on your keyboard. Type your command and press ENTER to execute it, press the key above the TAB key to close the console. Some changes may require to restart the game before they apply.
R_fullscreen: Set on1, the game will play on fullscreenR_mode: To change the resolution, enter the desired one width x height for example 1920x1080R_showfps: Set on1, it will show the FPS ingamestart: Addnameofthemissionto launch the missionForce_roadblockRocketpunch: Makes you fly especially if you type500Killg_invinsibility 1g_infinite mass 1gameses:GetPlayerCar():Enable(true)to enable parked cars using shift. You must be in a parked car before opening the console and entering this.gameses:GetPlayerCar():SetFelony(0)to set felony to any level or zero
Etc… There are console commands for cheat codes too.
How to use Level Editor
Extract the files in your DRIVER Syndicate install directory then go to EqEngine-DrvSyn-SDK\Tools and drag all the files there to the roots so there are in YourInstallDirectory folder directly (same place as the DrvSyn.exe).
Now you can open LevelEditor!
Be sure that both DRIVER Syndicate and Level Editor are on the same version (if DRIVER Syndicate got an update, you will need to get the updated Level Editor too).
The controls details listed below can also be found in the Tools folder of the Level Editor in the file called LevelEditor.md that can be opened with notepad.
Main controls
Holding SHIFT lets you control the cameraDrag with Left Mouse button: rotate cameraDrag with Right mouse button: camera dolly mode (move forward and back)Drag with Middle mouse button: moves camera up-down and left-rightRotating Mouse Wheel: changes camera movement speed
Other controls:Ctrl + Z: Undo action (only works with Height field editor for now)Ctrl + H: Toggle heightfield tile helpers display
Height field editor:
Controls:
Space: rotate texture for placementControl + Mouse wheel: Changes radius of toolLeft mouse: sets tile texture and properties (see “What paint” and “Tile flags”)Right mouse: deletes tile texture, keeps propertiesMiddle mouse drag: draws a line and performs same as left mouse for each tile in line
Holding Control: changes height of tiles, pressing left, right and middle buttons behaves as above for height (see the Height Paint settings)Holding ALT: On left click copies Tile properties, including tile height
UI explanation:
"LAYER": There is 4 layers of heightfields so you can create something like bridges, or water.
Please note the AI Roads are forced to be at LAYER 0
"Draw helpers" shows you what kind of tiles are painted on region. Color shows what tile flags set
Tile flags defines how geometry of height field is generated:
- Detached - tiles will not be sloped to surrounding tiles of non-detached
- Add wall - adds a wall to the detached tiles
- Wall collision - pretty self explanatory
- No collide - this tiles has no collision at all
Level objects:
T changes placement mode (Tile or Free)Space: rotate 90 degrees for placement
Left click: places objectRight click: removes object (if it's placed on Tile)
Control + Left click: toggle selectionControl + Space: duplicate selectionESC: cancel selectionDEL: deletes selectionG: movement mode
R: rotation mode (Alt+R will reset rotation)
N: set the name of object (for scripting purposes)
Object list/picker panel:
Right click - show context menu
Building constructor:
It has to be reworked.
Basically works just like Level objects editor.
But if you want to create new building, you have to create models for templates and place variants.
Occluder editor:
This is an important tool because you can seriously drop performance with your cities.
Manipulation:
Control + Left click: toggle selectionESC: cancel selectionDEL: deletes selection
Placing:First left click: begins occluderSecond left click: sets end pointThird left click: sets the height of occluder and ends it.
Road editor:
Holding Left Mouse: paints waypointsHolding Right mouse: removes waypointsHolding Middle mouse: draws a line, if Straight is selected, it will paint road in that direction
Space: rotate 90 degrees for placementT: cycles between types
Prefab manager:
This tool still not completely done, it must be able to save/place object and occluders
Placement mode:Double click in list to select prefabSpace: rotate 90 degrees for placementESC: cancel placement
Creation mode:
Just select the region by dragging mouse with left button pressed, and press Create in the UI
Video on the basics:
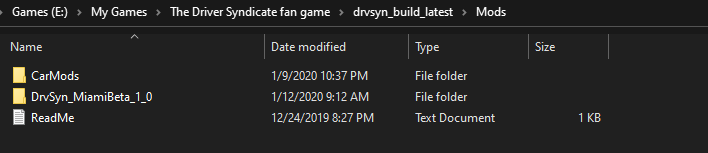
How to import a new car
If you download Miami by _matti it comes with a working CarMods folder and script. To use the Arvensis and other cars you put into CarMods you should remove the “example mod” folder and have it look something like this.
How to change the car of the Job Interview
Go to gamedata/scripts/missions/training then open with notepad ivew.lua then look for carname and change “rollo” by the name of the car you want (“arvensis” is the PSX car).
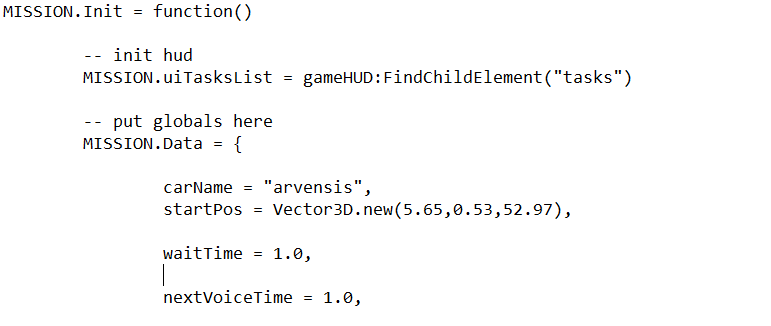
Don’t forget to save in notepad!